I Love Lamp: This Guy Loves Lamp Too
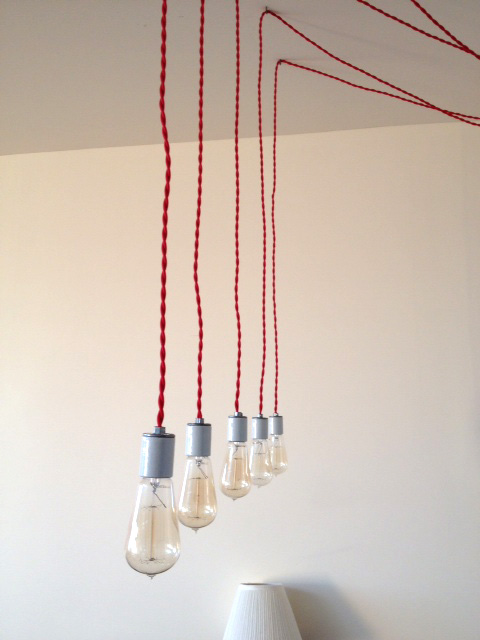
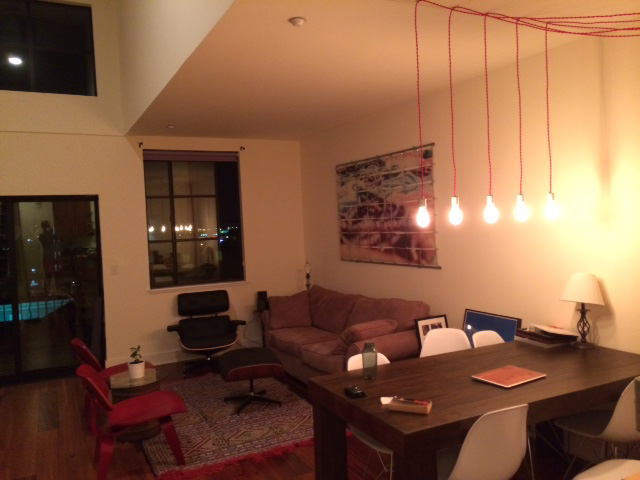
Yeah, I love lamp. But so does my friend Adam who loves lamp so much he made his own uber cool industrial chic chandelier. Check this OUT:

And you know how extra cool Adam is? He wrote out a full shopping list and set of DIY directions just for you! GO MAKE THAT LAMP.
SUPPLIES:
-250-foot spool of 18-gauge twisted-pair rayon-covered wire x1 (I only needed about 110 feet, but buying 250 feet was cheaper than per-foot prices of $1.50 or $2/foot)
-Wire staples x15 (I bought a 100-pack, but only used about 10-15)
-Small metal box x1 (for all the wire connections)
-Bigger metal box x1 (for the dimmer switch)
-Dimmer Switch x1
-White keyless porcelain bulb socket x5
-Edison bulb x5
-Wire nuts x15 (I think I used about 10-15 of the whole set. they need to be small to fit in the small metal box)
-Rubber Grommets x8 (the ones I used had a 1/4" inside hole and needed a 3/8" hole in the box)
-Drywall screws x2 (to mount dimmer box to wall, may change depending on your wall type)
-Outlet box/switch face plate screws to mount dimmer to metal box (may come with your dimmer switch; I used an old dimmer so went and bought two screws and two nuts)
-Plug
TOOLS:
-Drill
-Drill bits for metal (usual sizes, including 3/8" bit. This set has 'em all)
-Hammer
-Pencil (for marking walls)
-Tape measure
-Lighter (or electrical tape; the cut ends of the rayon on the wire need to be secured either by bits of tape or a REALLY quick pass of a lighter--you don't want to melt the wire's actual insulation)
-Wire cutter
-Wire stripper
-Xacto knife (useful for slicing the rayon covering off the wire without hurting the insulation beneath)
HOW DO MAKE IT:
1) Figure out how you want your light fixture to look. Figure out what it's going to hang over, how the wires will be spaced from the ceiling, and how far down. Figure out where the outlet is, where the dimmer will be mounted, and then figure out the following wire lengths:
-plug to small metal box (where all the wires meet and connect)
-small metal box to dimmer box
-small metal box to each lightbulb
Add some extra to the length of each piece of wire that runs from metal box to lightbulb--I added a little over a foot on each. This is important because it leaves room for error and makes the project more flexible. Want to move your table out from the wall another foot? Awesome, just move the wire staples and you have the slack for it.
2) Cut--and label!--each piece of wire. Measure twice, cut once.
3) Strip the rayon off of the last ~inch of each end of all of the wires. The ends that go into the bulb sockets should be more like 1/2" stripped.
4) use electrical tape in little pieces or a quick pass of the lighter to melt the rayon to keep the rayon wrapping from fraying. It's important not to harm the insulating rubber beneath the rayon. The rayon is purely decorative, and doesn't act as an insulator here.
5) mount light sockets to the 5 wires you've cut for this purpose. if you're putting any shades on the lights or anything of any weight, then you'll need additional strain relievers)
6) mount plug to end of plug wire
Sidebar: this is where it's useful to know an electrician or have a father who knows how to do this stuff. it's important that the right wire goes in the right places, and that your wire, dimmer, and sockets can take the load of the lightbulbs. in my case, I have 5 40-watt bulbs, or 200 watts total. 18-gauge wire is fine for this, and my dimmer is rated at 600 watts. You also have to pay attention to which wire is which. white=neutral and black=hot. in general, the narrow plug prong aligns with the "hot" (black) wire, the middle/end contact in the light sockets should also have the "hot" wire, and the dimmer should go on the hot side of the circuit. don't make this project unless you know what you're doing here, and I'm not really implying thatI know what I'm doing here, either
7) starting from the desired positioning of the light bulbs over your table or whatever, measure out where to put the wire staples to hang the bulbs. mark your ceiling for them and then hang the heck out of those wires. it's important to start from where you want the lights to be and work backwards towards the box because who really cares where the wires end on the plug side? you want the light bulbs to be where they're supposed to be!
8 ) once the light sockets are hung where they're supposed to be (the interwebs recommend 28-34" above your table in a dining setting), run the wire--using the wire staples+hammer as necessary--towards where you plan to have your small metal junction box.
9) drill 7x3/8" holes into your small metal box, 1x3/8" hole in your large metal dimmer box, 2 holes for your drywall screws in the back of the dimmer box (to mount it to the wall), and 3 holes on the lid of your dimmer box for the dimmer (one big one for the dimmer shaft itself and two smaller ones that align with the holes on the dimmer to attach the dimmer itself to the box lid)
10) put grommets in all of the 3/8" holes
11) Assemble dimmer and box: attach dimmer to dimmer box cover, attach dimmer to wire you've cut for that purpose (threaded through the grommet), attach dimmer box to wall, attach box cover (with dimmer attached) to the box, put the knob on the dimmer.
12) run dimmer wire to small metal junction box
13) connect everything. DO NOT plug the whole thing in until you're done. this is where I'm going to be purposely vague--you shouldn't do this project if you don't know how to connect everything in the small metal box. make sure you run wires through the rubber grommets so the metal edges of the holes don't hurt the wires.
14) once you've double-checked that all of the wire connections are secured, that no bare wire is showing, etc, close up the wire junction box, leave it out of the way on the floor or attach it to the wall (your choice! mine is on the floor under the table).
15) screw in the lightbulbs (how many people does it take?)
16) make sure the dimmer is off, and plug that baby in. if there's no smoke/no circuit breakers have tripped, you're almost there. turn that baby on!
17) if there's still no smoke or tripped breakers, then clean up and enjoy your new lights!


